How to transform a closet into a kids art space
February 6, 2022
Converting closets into WFH offices was so 2021. Here’s an updated version that will keep your whole family happy this year and beyond: a kids art “cloffice”
The one thing I’m amazing at? Finding underutilized spaces in homes. When I’m not with my organizing clients, I spend so much time tweaking my own home. We’ve lived in this mid-century rambler for over five years and there’s a never ending list of projects. We’ve got the big ones mostly covered: kitchen, bathrooms (work in progress as I type), hall closet. But the playroom is one that I am forever tweaking with small DIYs.
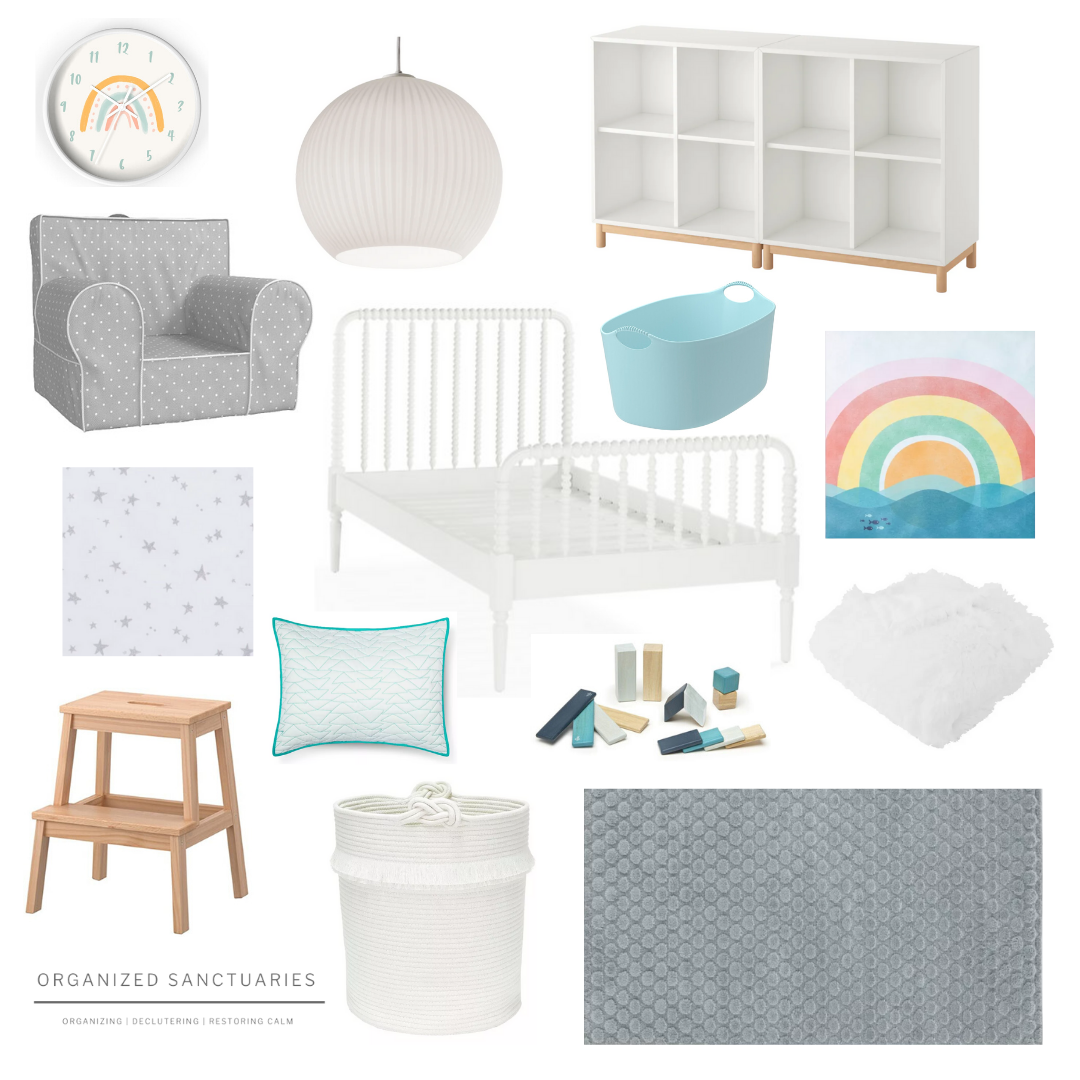
Remember this? One of my first blog posts, where I shared some IKEA hacks to make a simple, organized playroom. My kids are now much bigger and spend way more time crafting than playing. The IKEA table (yup, part of the 2019 project!) was too small for the two of then to spread out with all the paper, glue and paint. Not to mention we had a closet in their that was serving as a backstock pantry: why was I tiptoing through LEGOs and crayons to get the extra boxes of pasta!? They needed more space and I needed to give it to them.
We moved the backstock pantry to a much more practical spot (the utility room with the extra fridge, duh, Elise) and the blank closet was ready for a few weekends of DIYing.
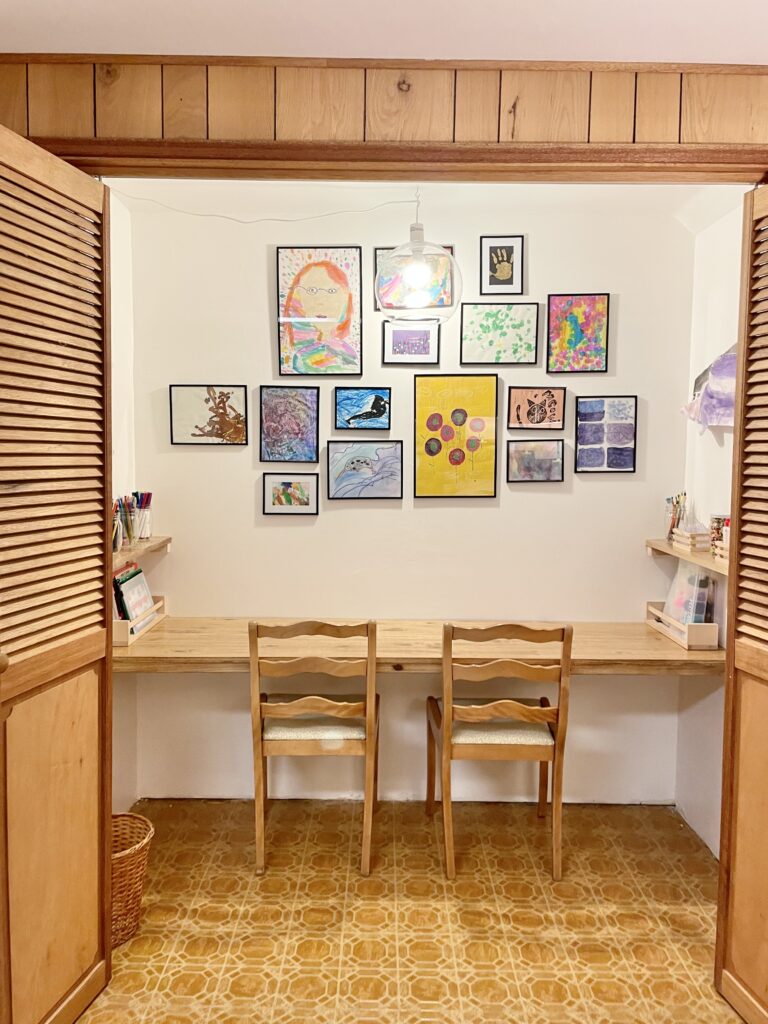
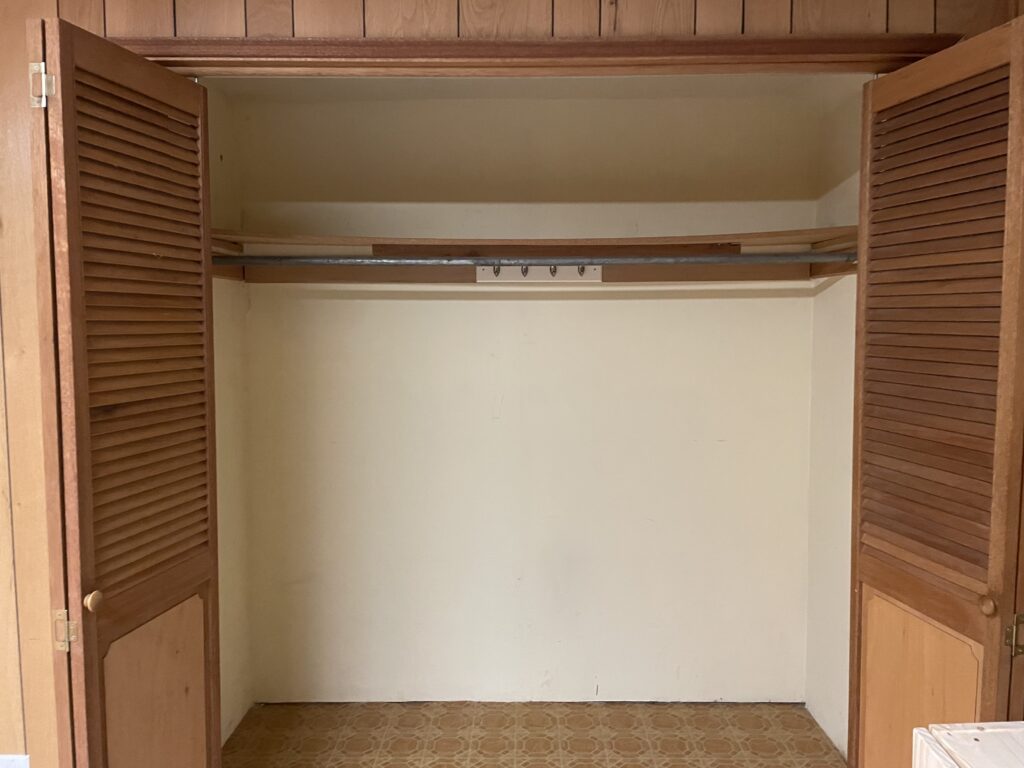
Here’s the before shot – breaking down the DIY so your kids can also have the art space of their dreams!
Materials + tools
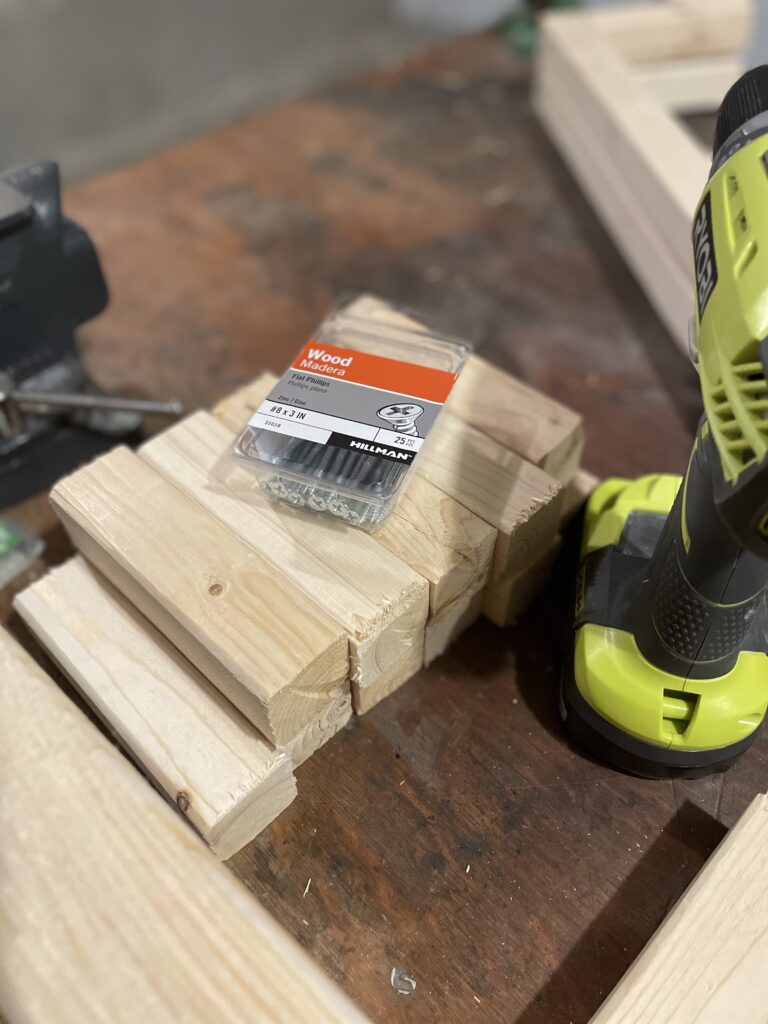
- 2 2x2s, the length of your desk.
- 5 2x2s, 2″ less than the depth of your desk
- Plywood for desk top
- 3 1/2″ wood screws
- Sandpaper
- Wood stain (I used MinWax)
- Sealant (I used MinWax polycrylic)
- Foam brushes for the stain and sealant
- Rag to wipe off excess stain
- Drill (I have the Ryobi drill, and love it)
- Clamps (not necessary, but helpful when securing the 2x2s together
- Studfinder
- Level
- Pencil
- Frames
- Picture hooks
- Hammer
- Toothpaste (for real! See below for the picture hanging hack I used)
Floating desk
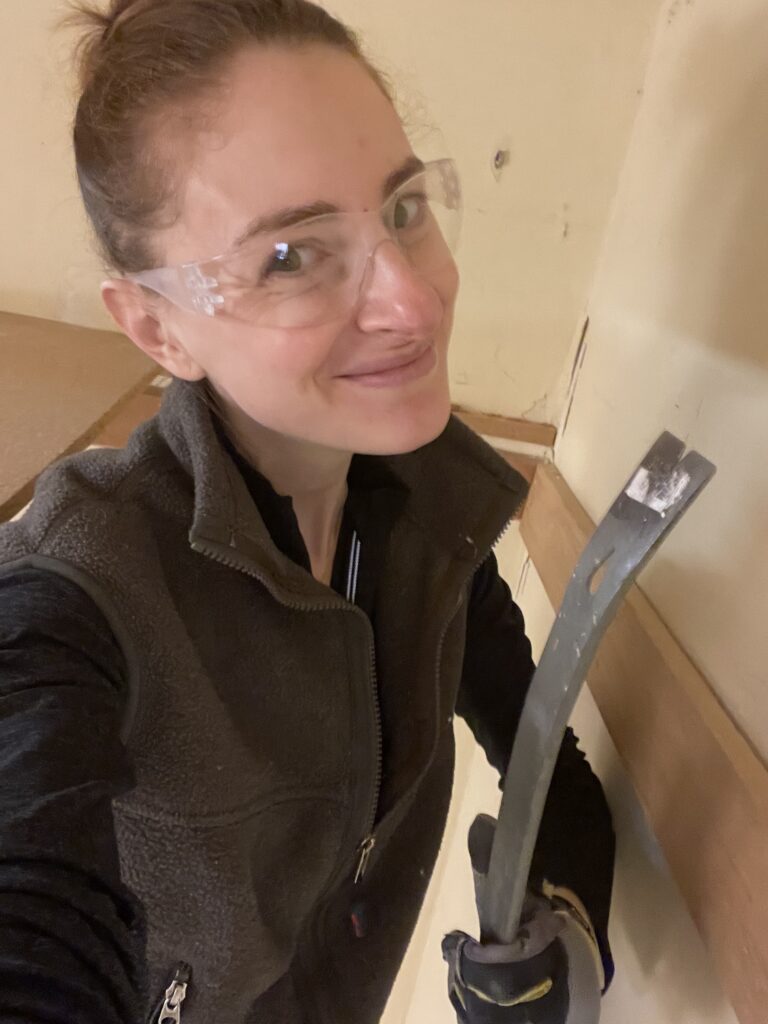
Step 1: demo the heck out of the closet.
The hardest part for me was the demo: music blasting, crowbar in hand, and adrenaline pumping, I realized we had water damage. The wall was crumbling and I needed to do some drywall repair. And go slow and steady. I don’t like going slow and steady. So assuming you don’t have a shower on the other side of your wall causing issues like I did, you’ll be wayyyy ahead of me.
Water damage aside, I loved it. Crowbar, on a ladder, goggles up: I felt powerful. The average closet has one rod and one shelf – neither of which are needed in a kids art space. Worried about when the kids will outgrow the crayons? I know mine will use this for a homework station down the road.

Step 2: measure and plan.
You can’t do this enough. Be sure to get all your measurements down on paper, especially if you’ll be asking the pros at Lowes to do your cuts like I did. Be sure to decide on how many shelves – which means you need to do some inventory of your kids art supplies, and what you honestly will be storing there.
Because we had these awesome old school bifold doors, I knew I wanted the desk to be about 2′ deep, so that we could close the doors with the chairs inside. Some of you might want to take the door off and have a super deep desk, but I honestly prefer a more shallow one. This way, stuff doesn’t get shoved to the deep end and get cluttered.
Step 3: prep the walls
I had lotssss of holes to patch with joint compound (see above: water damage). After sanding and a second coat of joint compound, I painted the ceiling and walls the same color. Because it was such a small space with a rather low ceiling, this was my easiest bet to make the space seem larger. I toyed with wallpapering the backwall, but ended up leaving it white so that I could fill the walls with color from displaying my kids artwork.
Step 4: build the desk and shelves
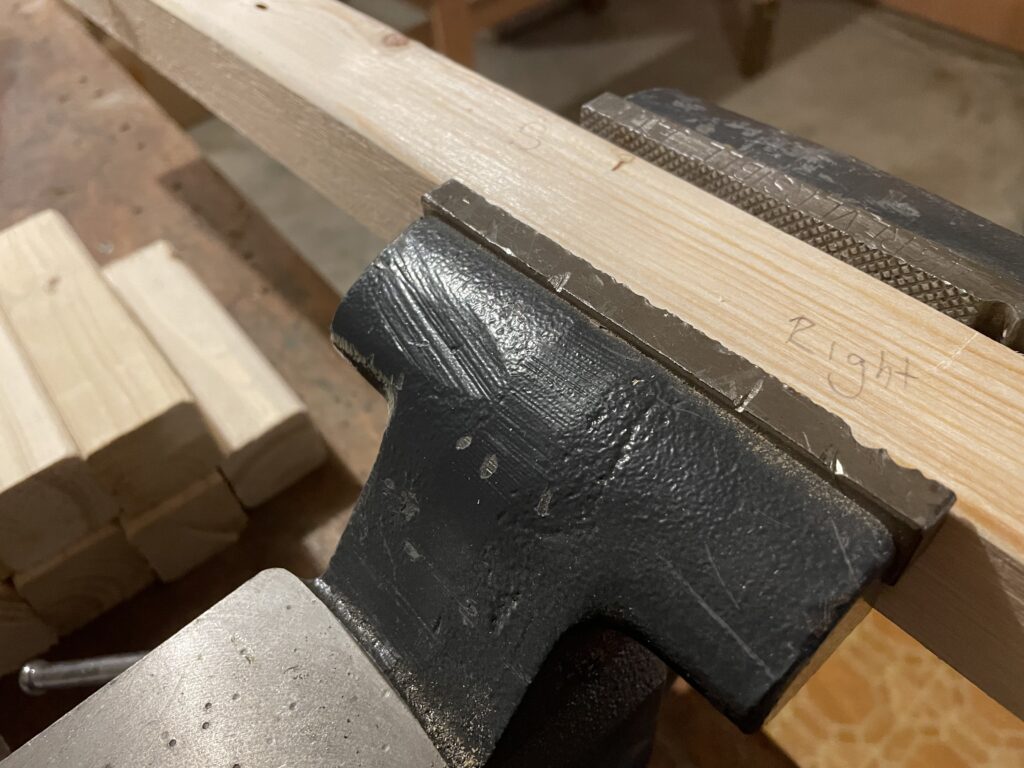
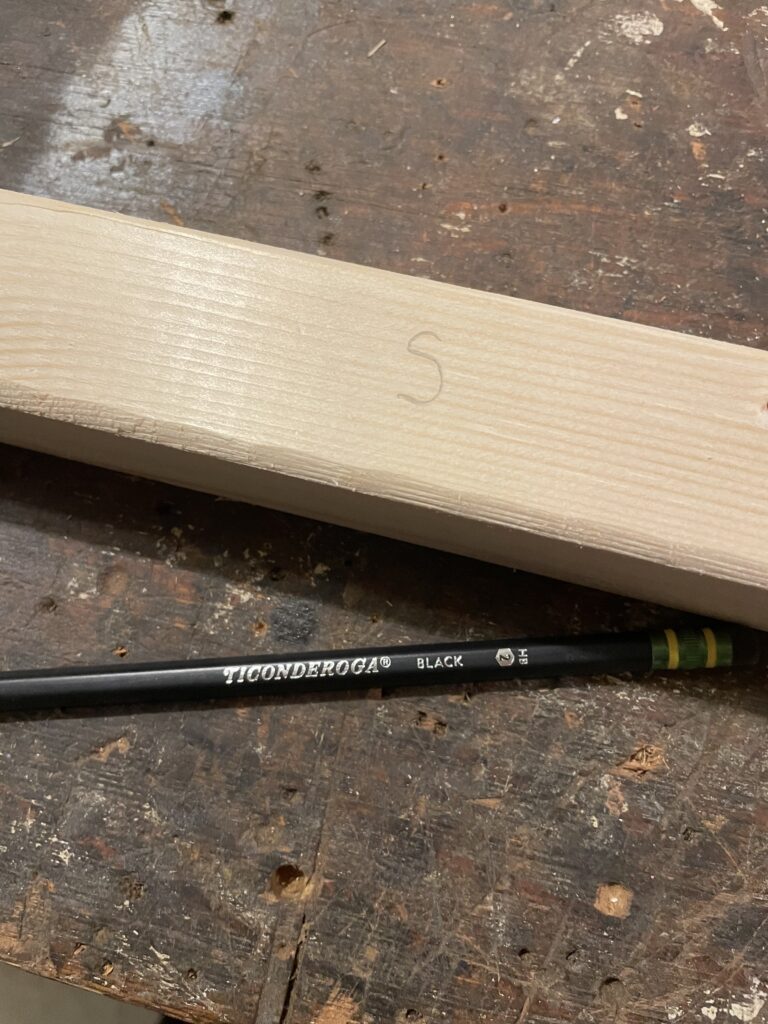

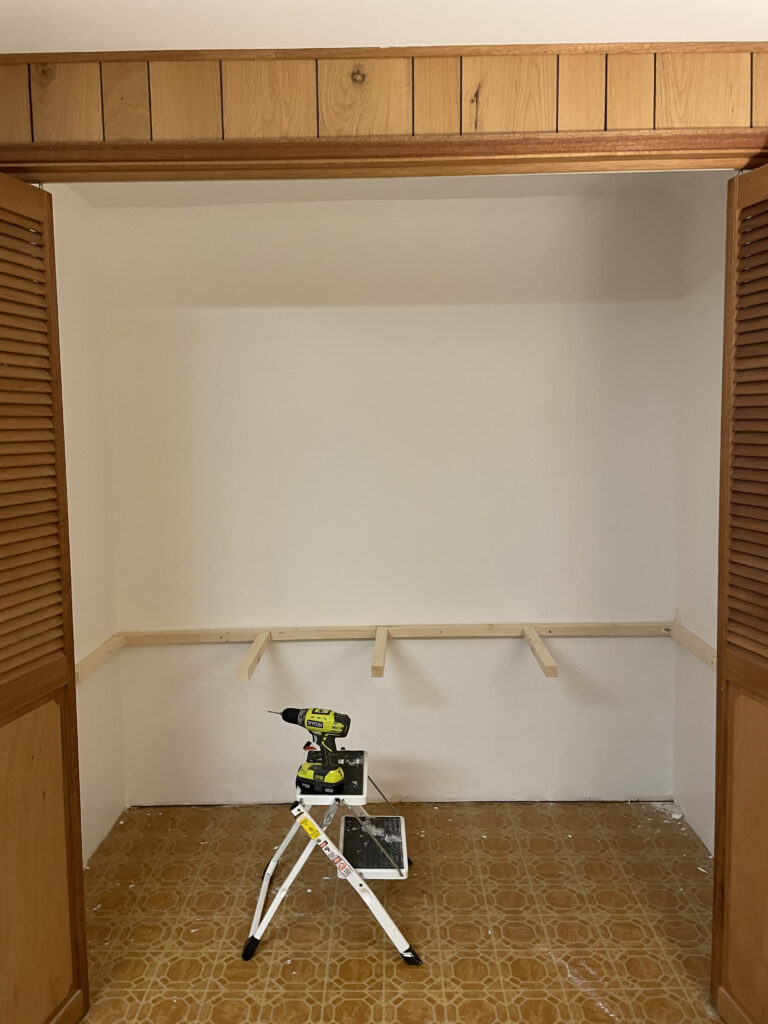
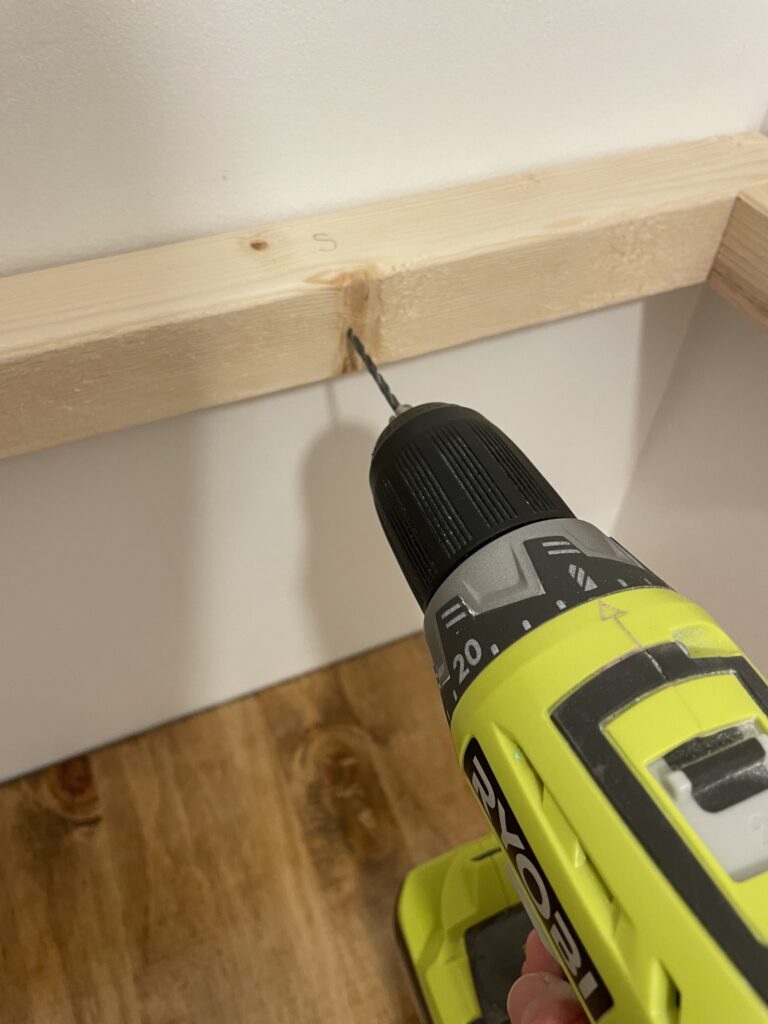
Making sure the desk frame measurements are accurate is the most important step to ensure that the floating desk is stable. I built the desk frame out of 2x2s, with a few crossbars in the middle for stability. My desk is 82″ long – anything longer than 3′ should have at least 2 2x2s running from the back to front frame. Because the left and right sides of my wall were slightly off (less than an 1/8 of an inch), I needed to slightly sand down one side. I noted which 2×2 was the left and which was right in pencil. I also marked on the 2x2s where the studs are, so that I would leave space for them between the crossbars (see pictures).
I secured the side and middle bars to the back part of the frame, drilled pilot holes into the studs, and secured it into the wall using 3 1/2″ wood screws. Be sure to have a quality stud finder – in fact, this project was the one where I finally upgraded to a high quality one. From the little online research that I did, anything in the $30 -$40 range seemed to be quality enough without blowing my budget.
Once that was attached, I secured the front part of the frame to the rest.
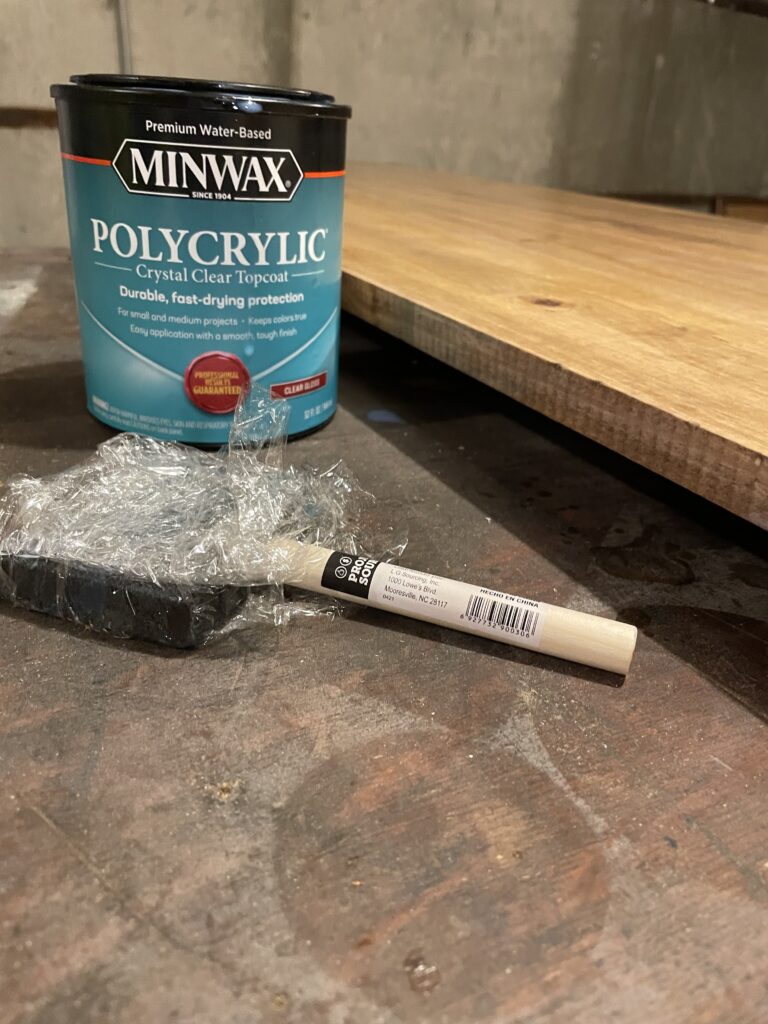
A basic shelving board cut to size was the most expensive part ($40ish for an 8′ board). I stained it with MinWax wood stain leftover from my daughter’s nightstand project, and finished it with 3 coats of MinWax polycrylic. I chose polycrylic over polyurethane because the lovely lady at Lowes told me it smells less with the same result. It had a great finish, and multiple art projects later, it’s holding up real nice. I think I’ll stick with polycrylic instead of polyurethane for my next projects!
DIYer tip: wrap the brush in plastic wrap in between coats and it won’t dry out!
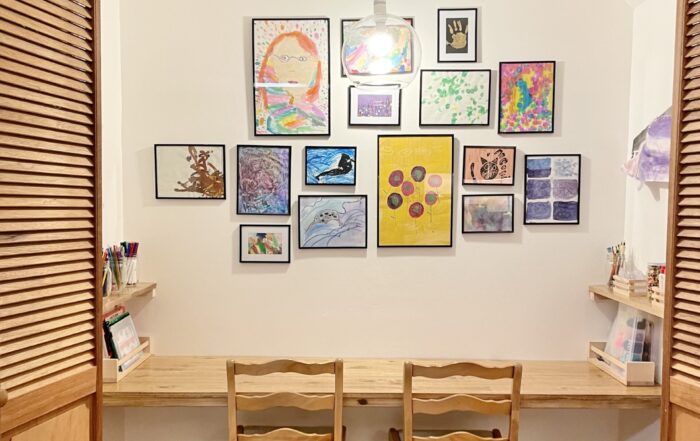
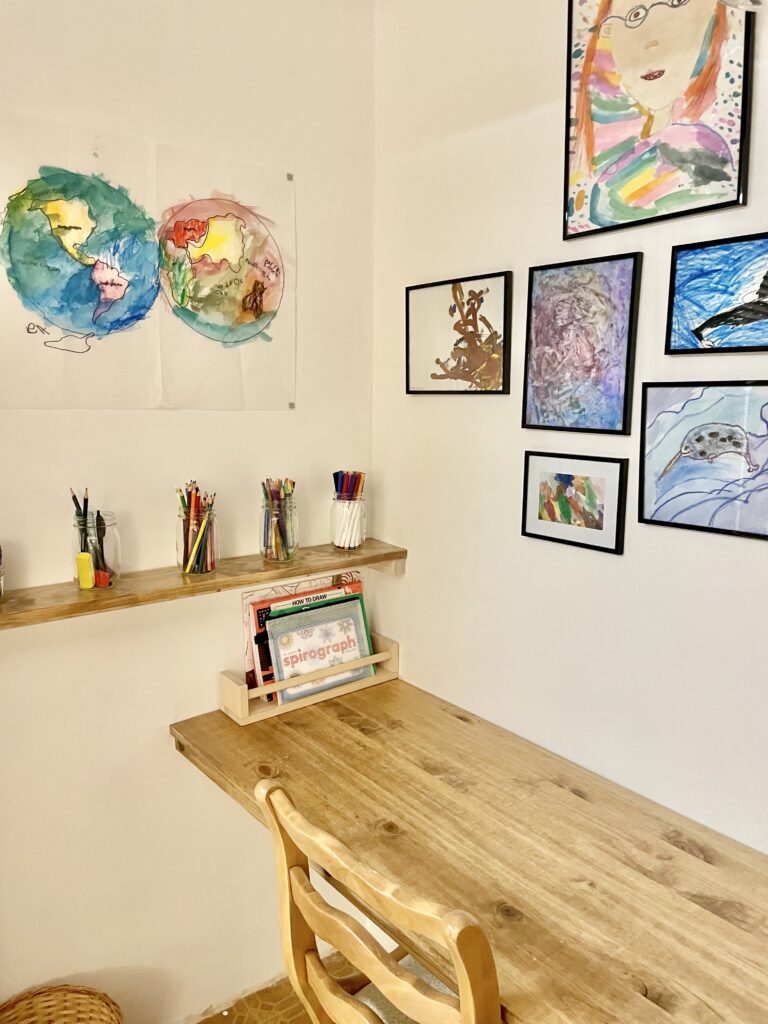
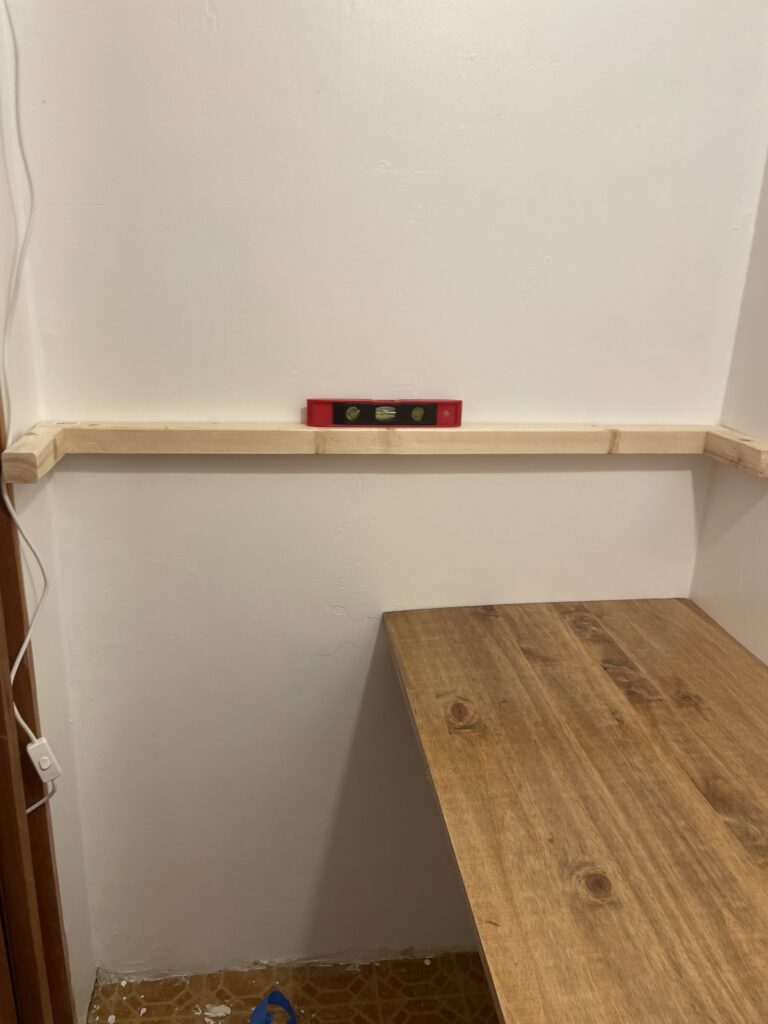
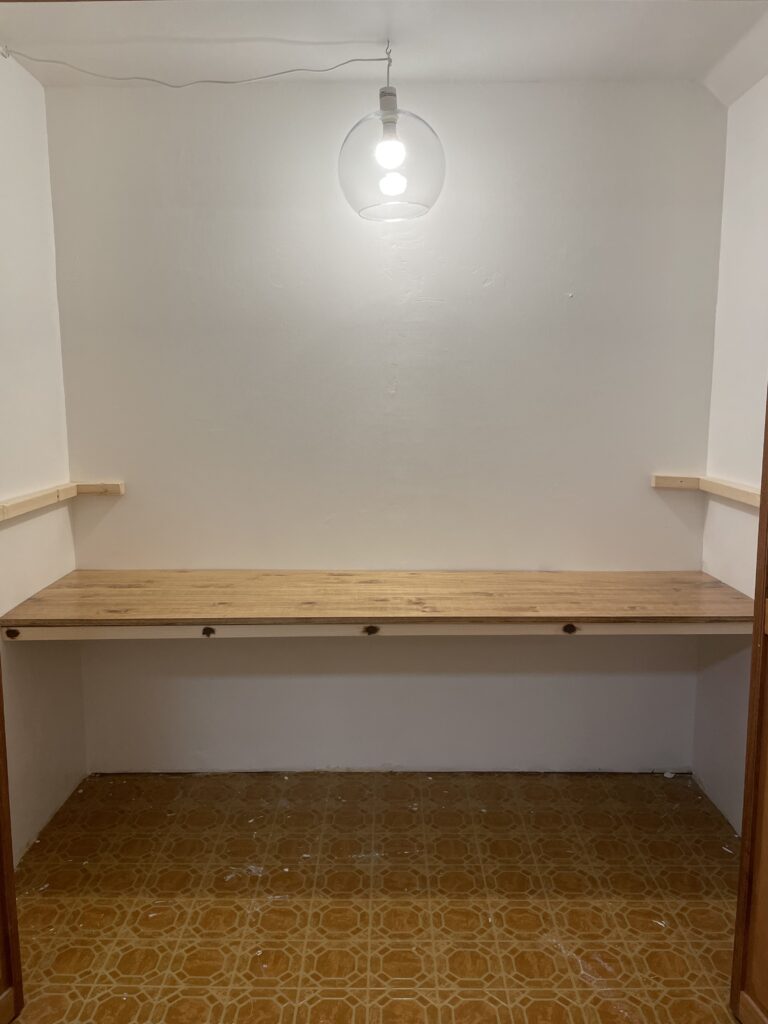
Floating shelves + gallery wall
These are basically the same as the desk, but with 2x2s as framing just on the back and sides. As a home organizer, I prefer shallow shelves over deep ones. These are 5” deep and are the perfect spot for jars of crayons, markers, and other basic craft supplies. No need for anything fancy: I used mason jars that I already had in my house. An IKEA BEKVÄM spice rack on each side holds coloring books, paint sets, and other regularly used items.
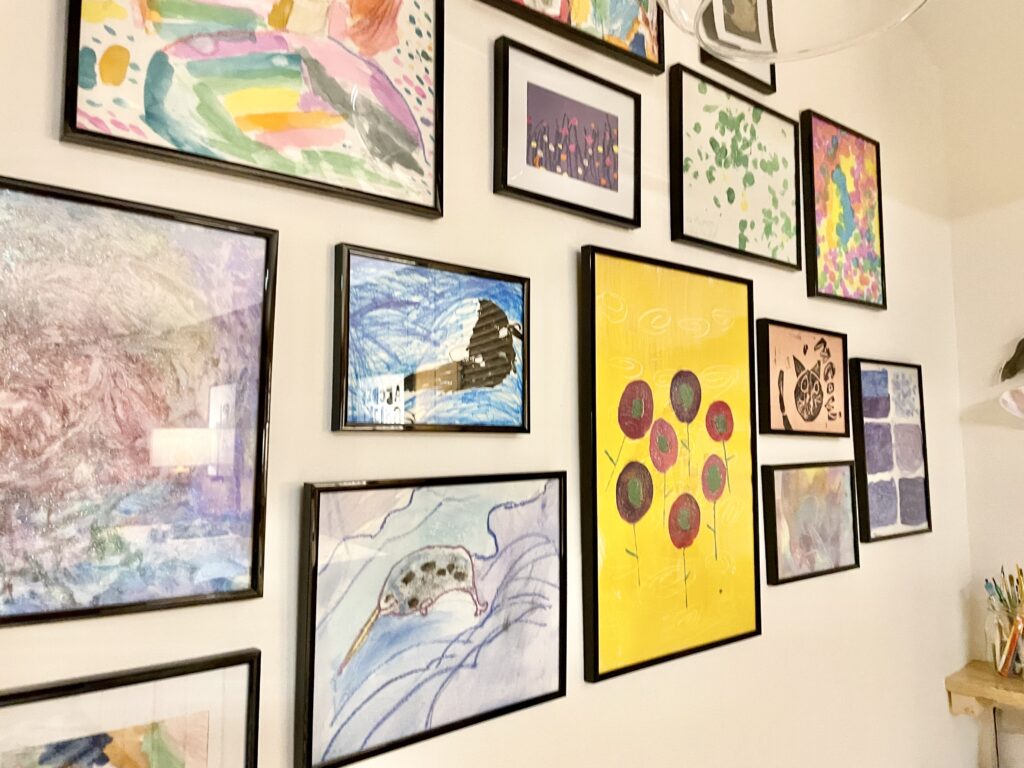
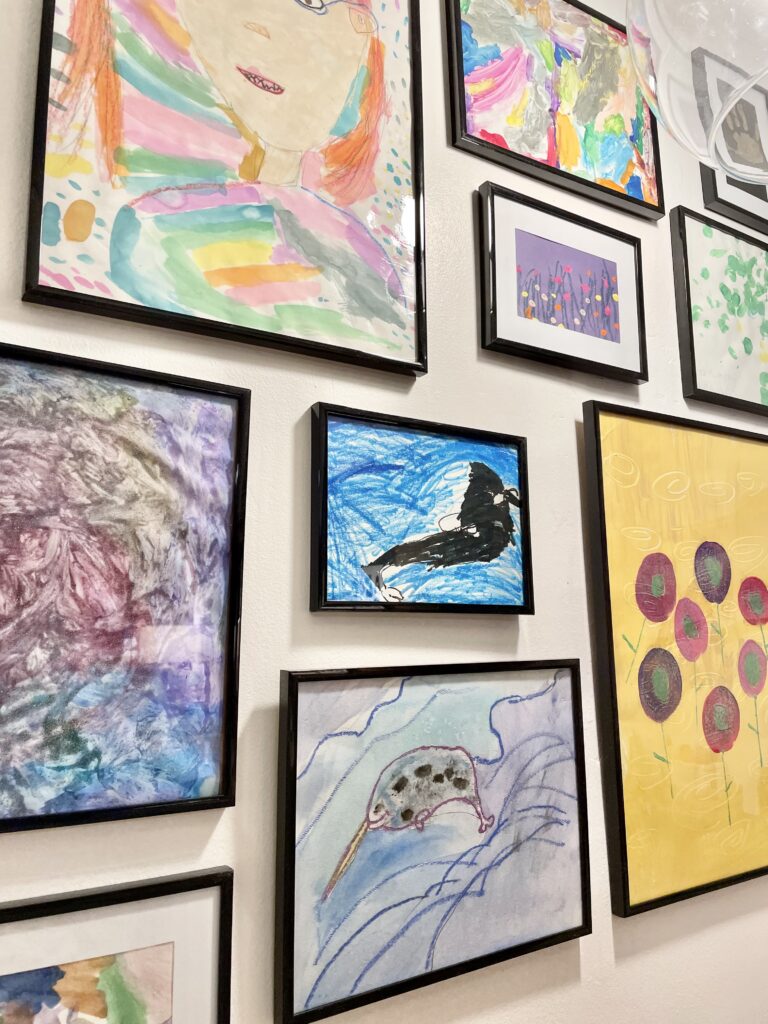
Making this space was totally about giving my kids a space to be creative. No better way to be inspired than be surrounded by their own masterpieces! The frames are from Michaels. To get the frames to line up exactly how I wanted them to, I used a TikTok hack that was legit amazing – add a dot of toothpaste to the frame, press it against the wall, and you’ll know exactly where to hang the hook. Brilliant!
There are a few blank spots – I plan on adding more as time goes on and they create more!
And that’s it! Our DIY art cloffice is complete. For now – I’ll fill in those blank spots on the wall with the art they continue to create.
Where do your kids do their art projects? What do you do with the finished work? Tag me in pics of your kids art spaces on Instagram so I can see them!