An upgraded IKEA playroom
April 14, 2020
Ikea playroom hack using IKEA Ivar cabinets and IKEA Capita legs
It’s no surprise I love IKEA: cheap thrills, the most adorable patterns, vanilla soft serve reward at the end… not to mention really stellar pieces of furniture. I’m talking solid wood, long lasting stuff. The trick is knowing how to sort through the chaos (and not get lost!) and find the real gems.
In my spare time, I would browse the maze, getting lost (even pro IKEA shoppers like me get lost every once in a while) and oogling all the bins, step stools, and kitchen glassware. And the kids section! Don’t get me started there. Or, actually, I do get started there, cause it’s my all-time favorite IKEA section.
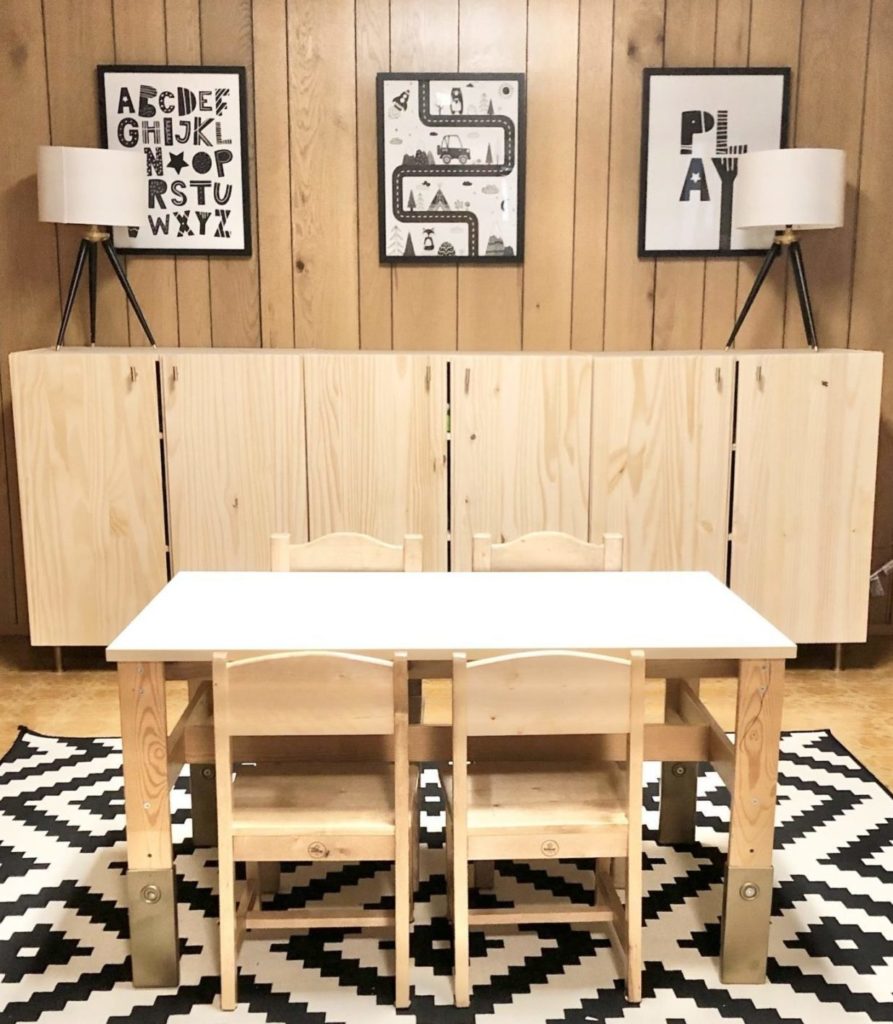
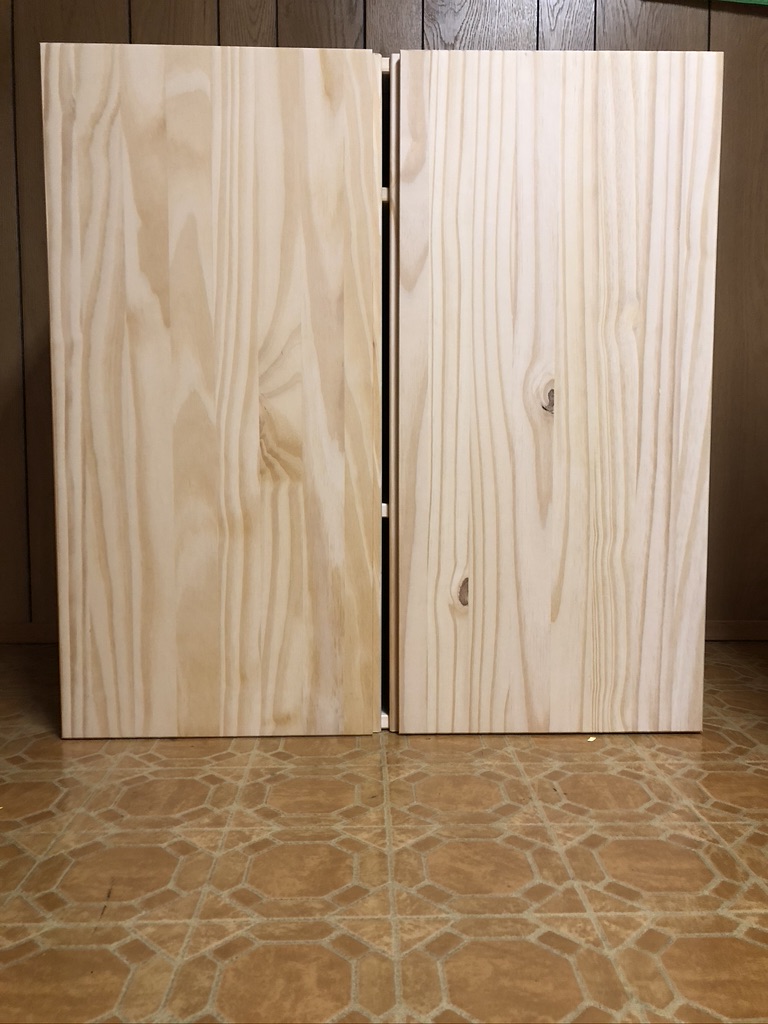
Speaking of kids IKEA stuff, I’ve been meaning to blog about my playroom. I chose the IKEA IVAR unit for my storage cabinets: they are sturdy pine, and quite deep. Here they are assembled, without any hack. Basic as basic can be.
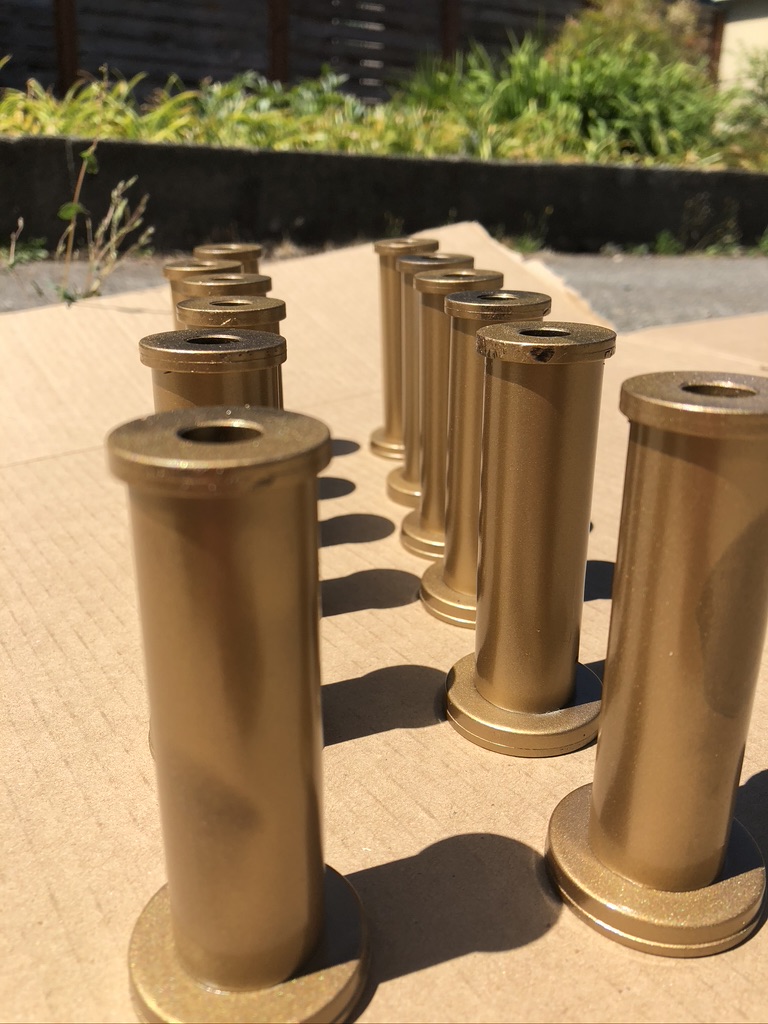
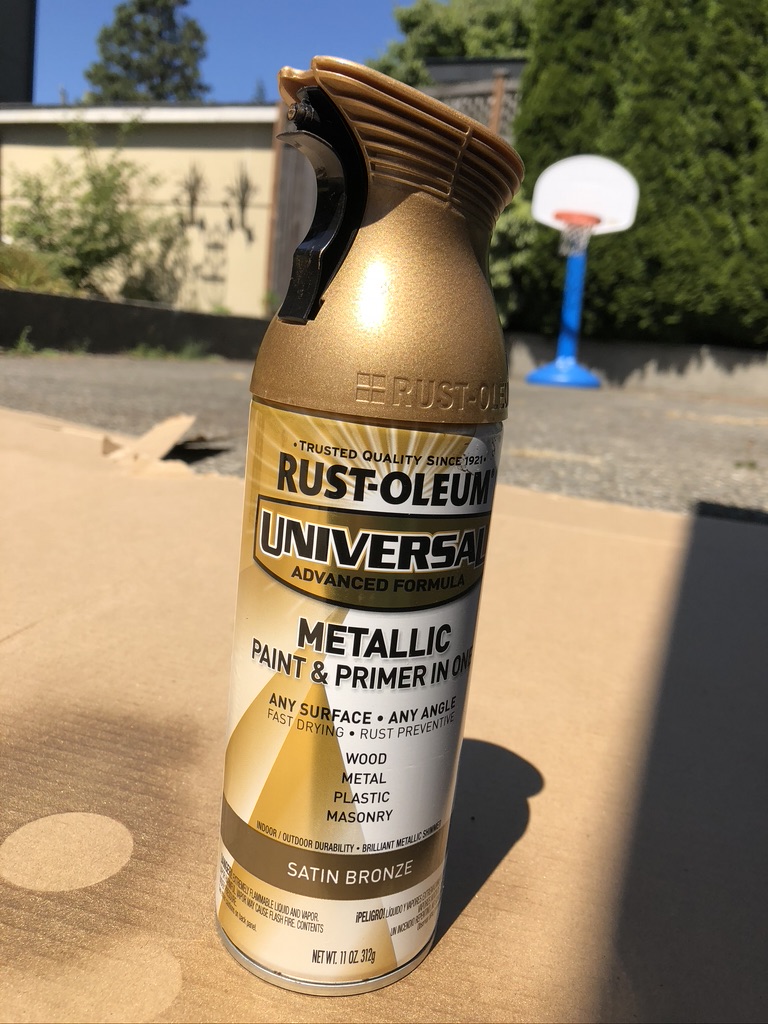
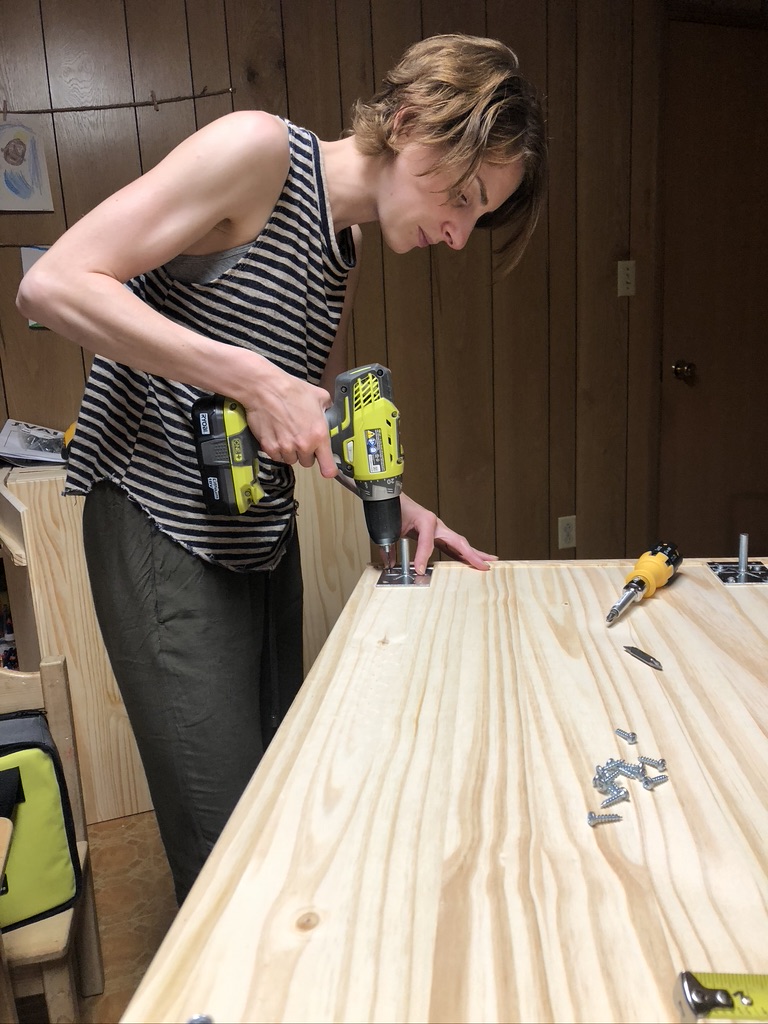
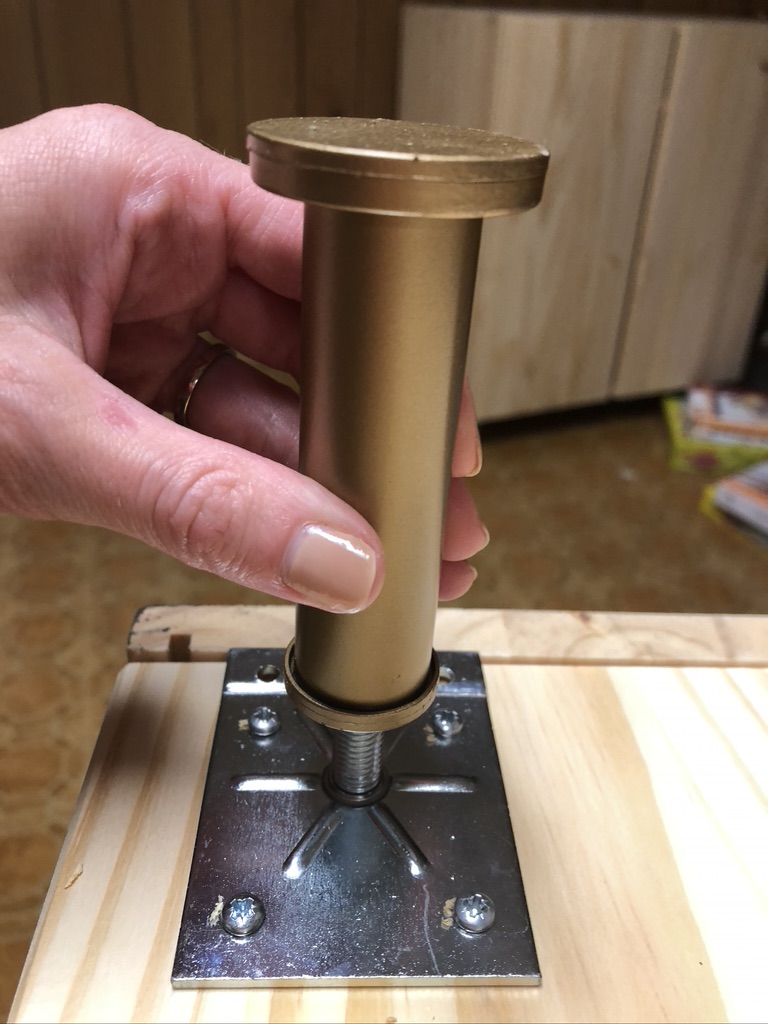
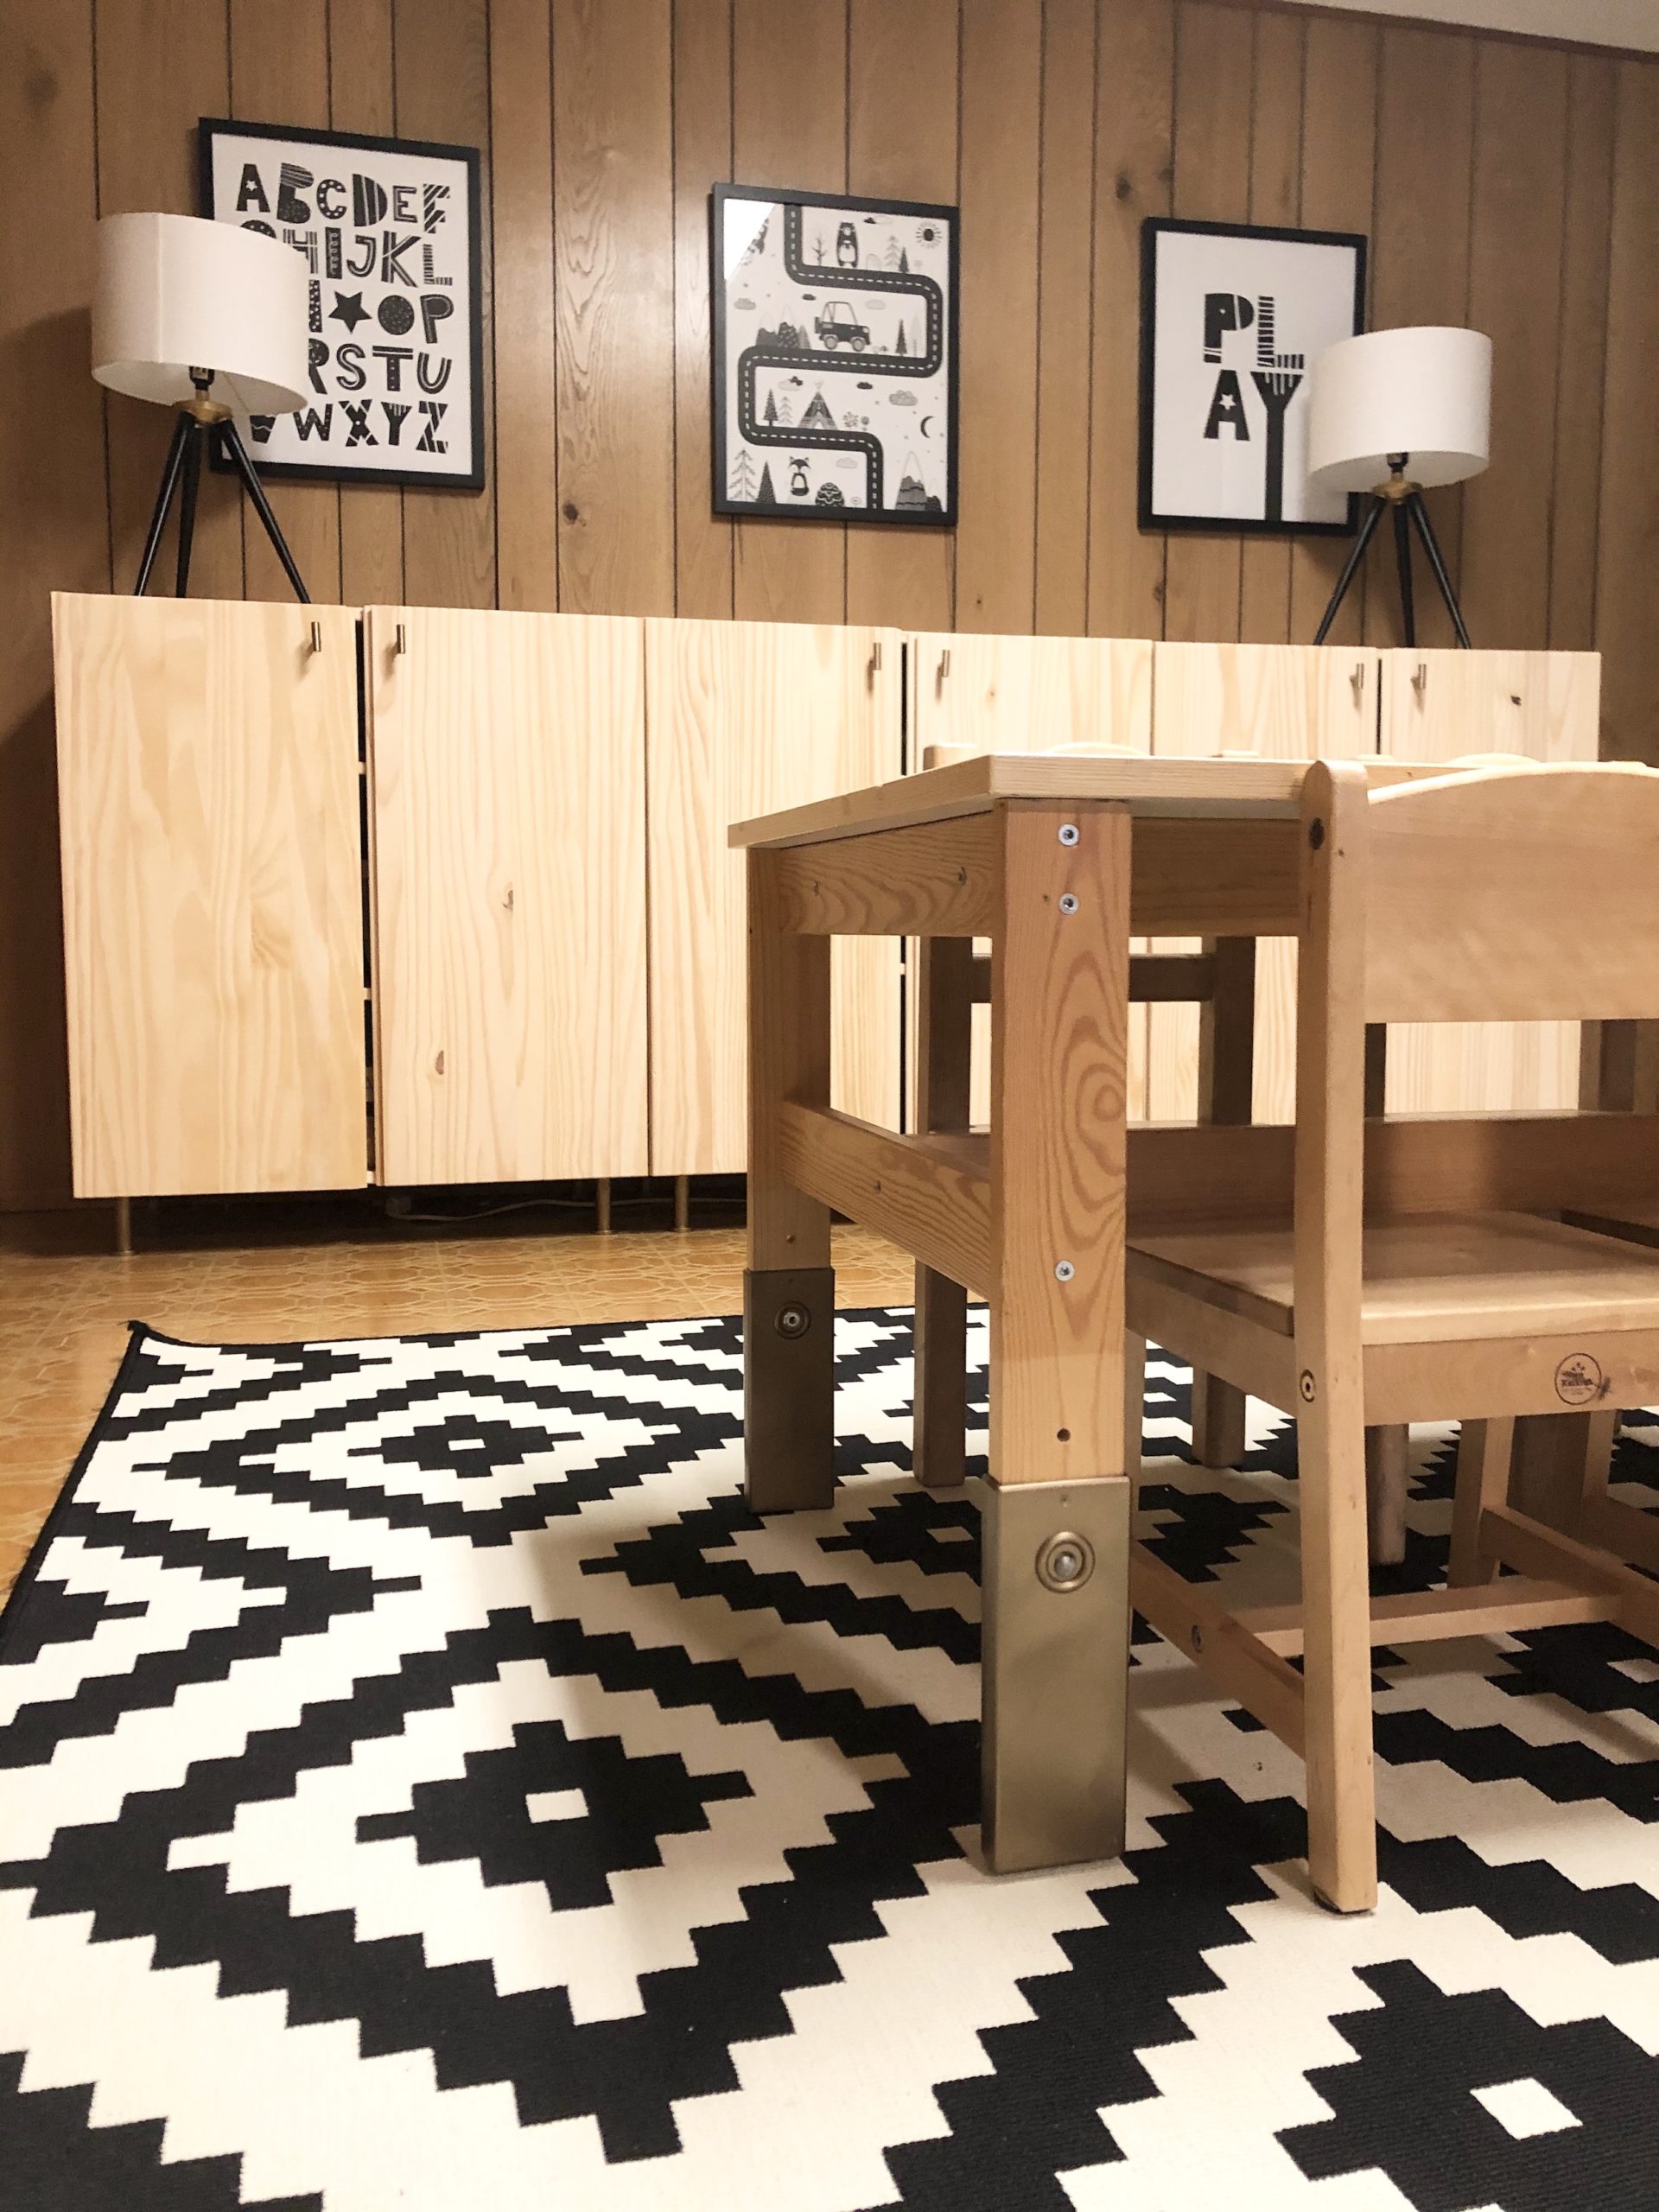
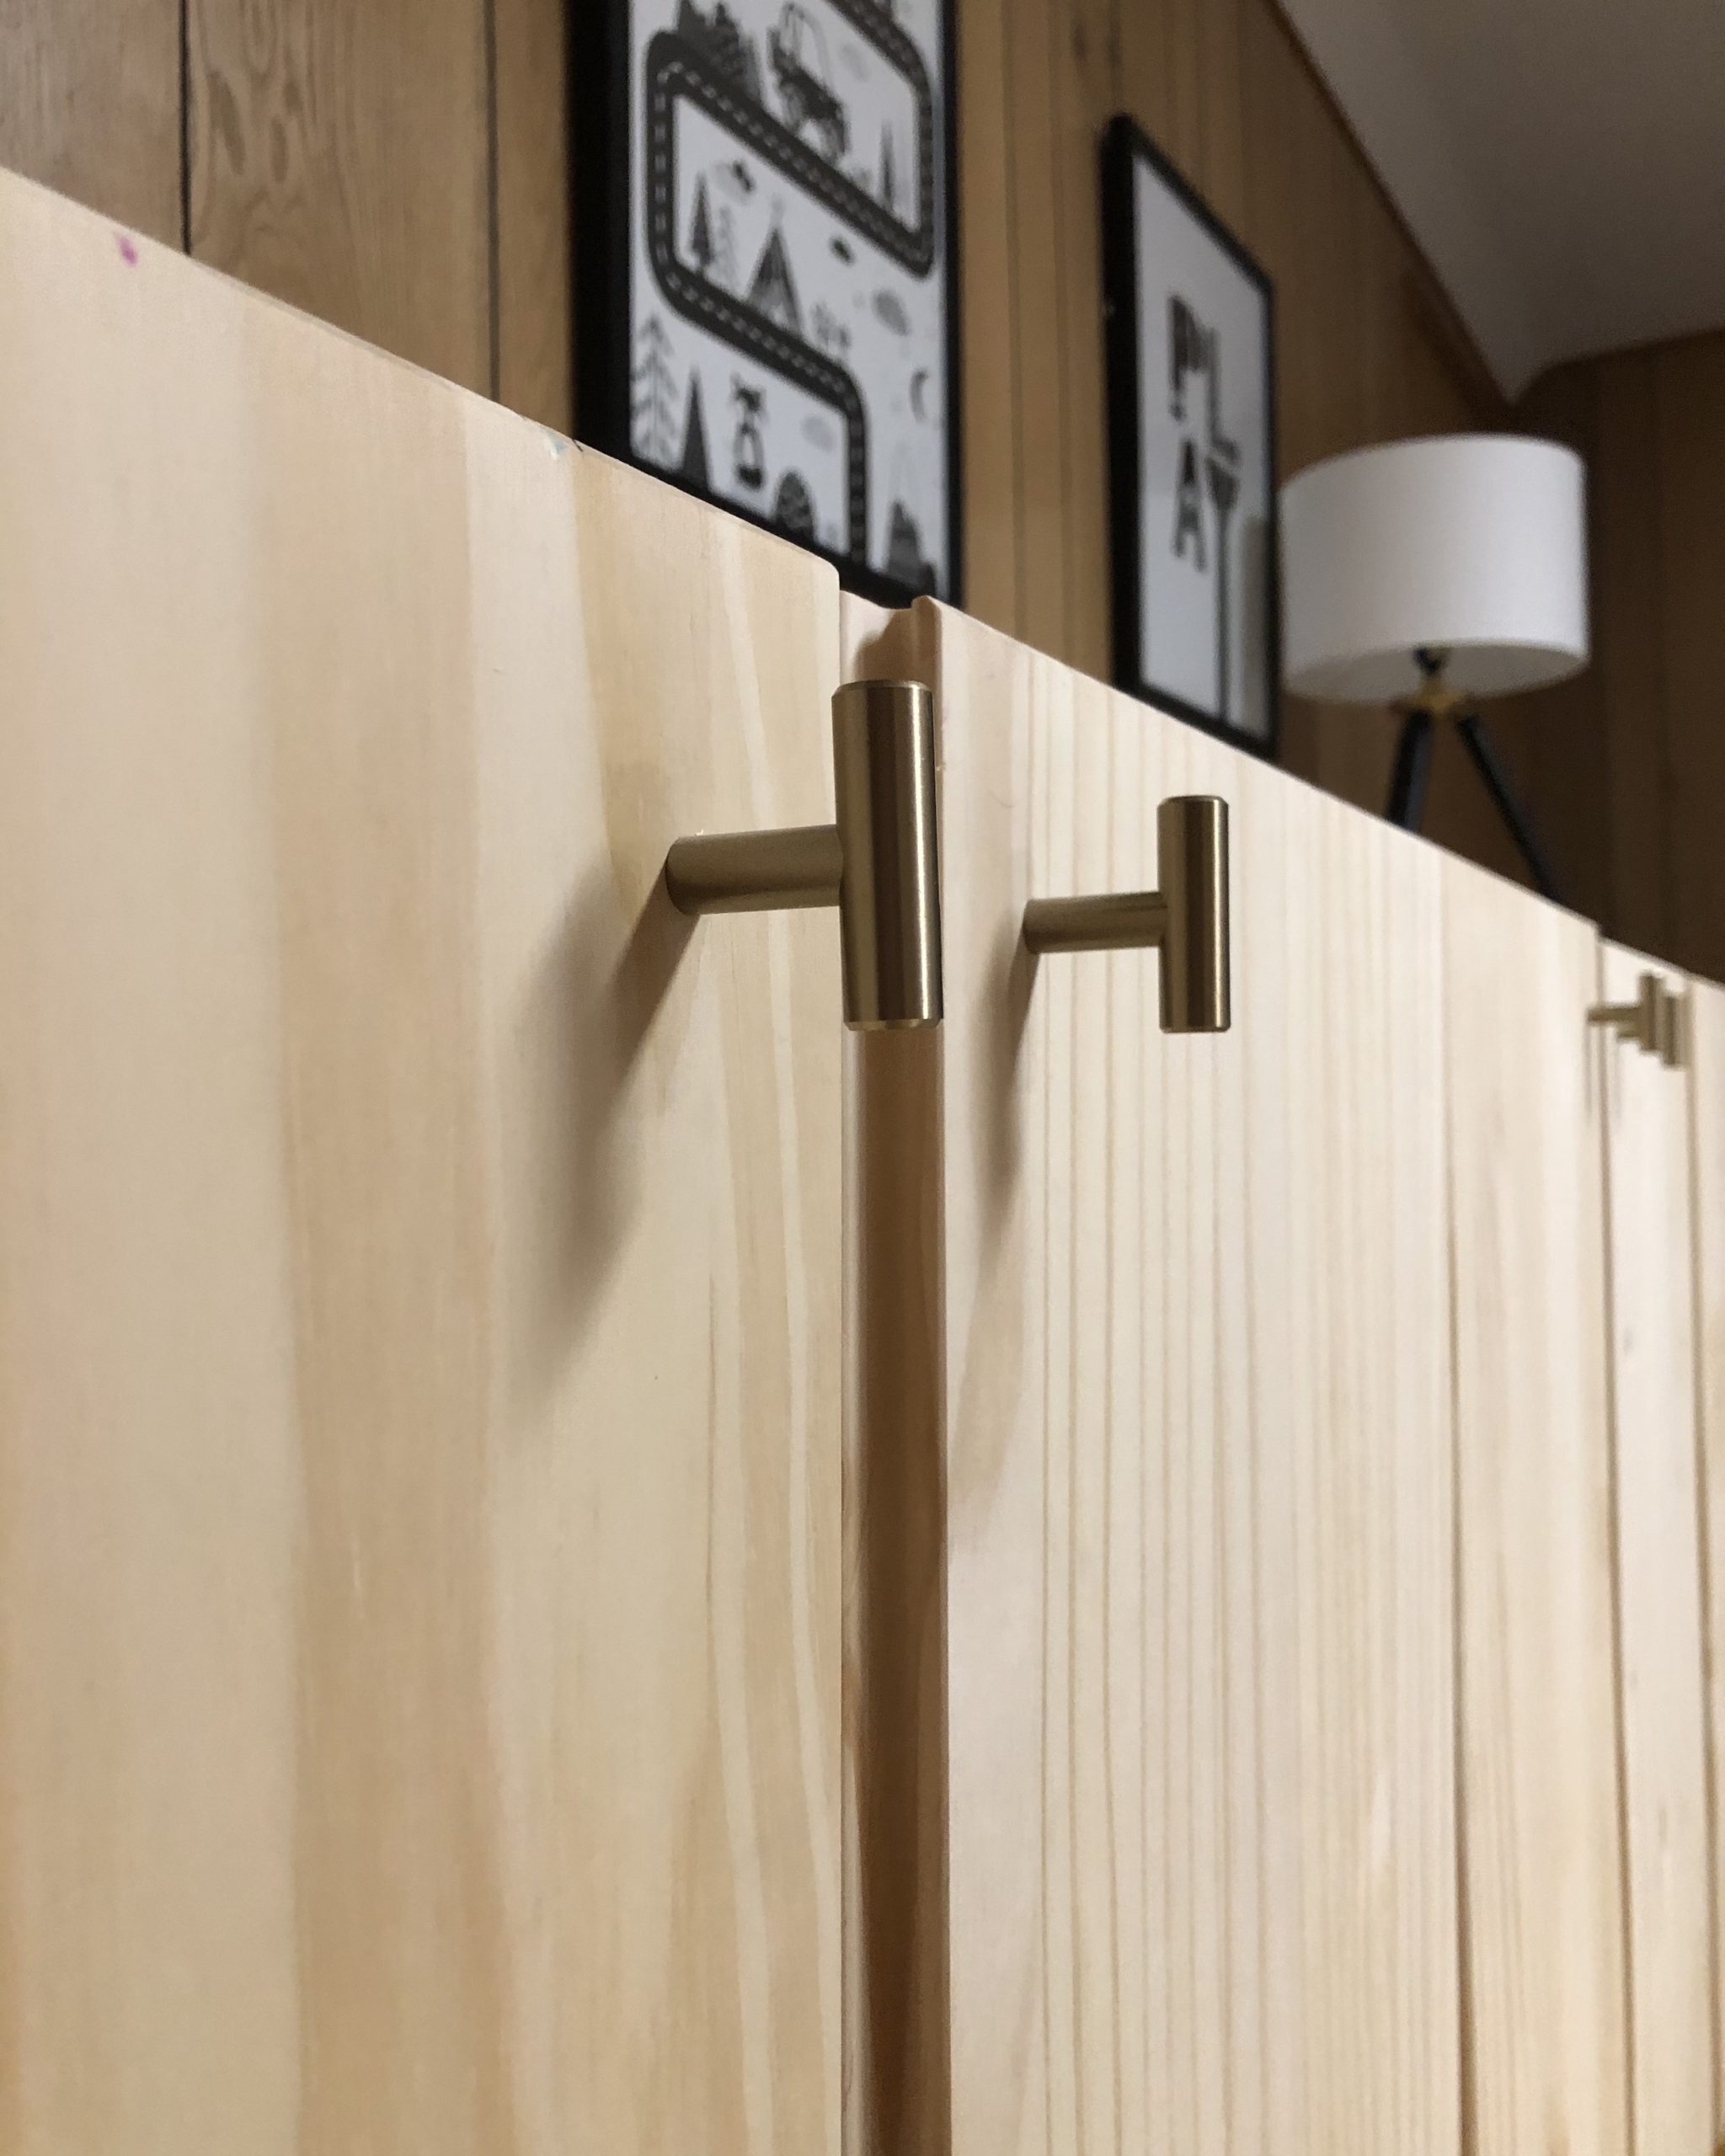
I spray painted IKEA CAPITA legs with Rustoleum Universal All Surface Spray Paint in Satin Bronze and added matching gold cabinet knobs. I (kind of) patiently waited for the paint to dry, and got myself set up for assembly. I also spray painted the legs of the kids table with the same Rustoleum gold paint. The table is the discontinued IKEA SANSAD table, originally with red and blue adjustable legs. Love the color as much as I do? It’s available on Amazon, and makes for a super easy DIY project.
Making it fit means making choices
When I purchased three IVAR units, I explained to my kids that whatever fits inside is what we keep. And what can’t gets gifted, donated, or put away in storage for future use.As new toys or art supplies come into the house, we go through the bins and make room for the new stuff. This way, we are easily able to see what we have inside the cabinets and play more creatively.
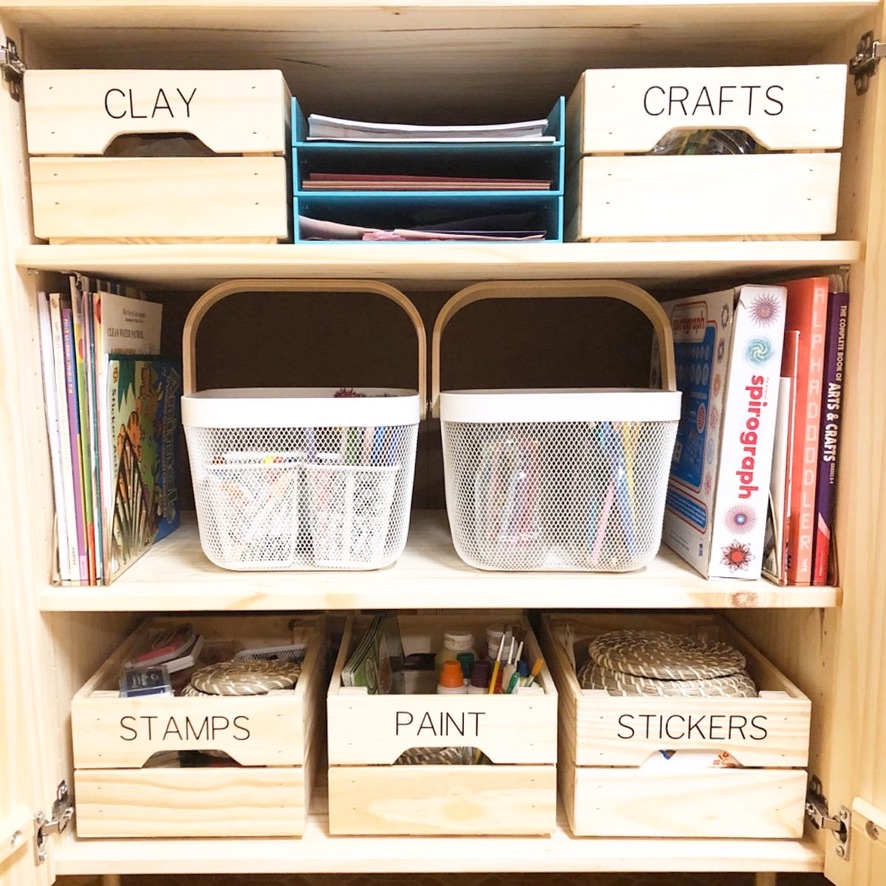
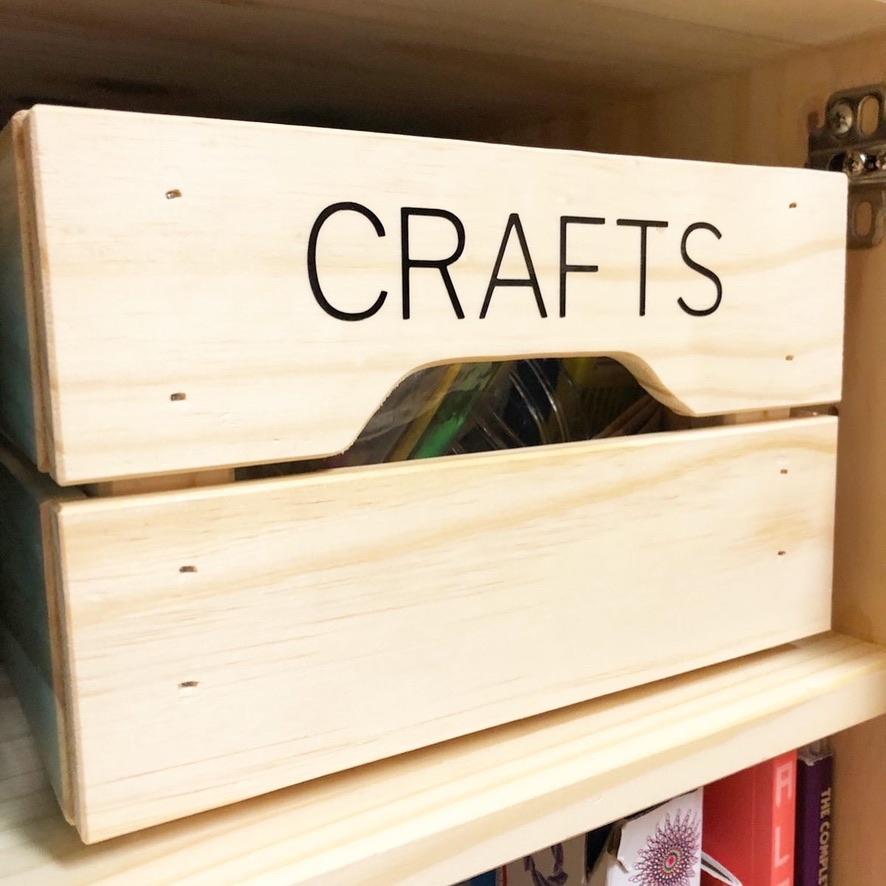
Sort and label
Keeping with the minimalistic aesthetic, I chose complimentary storage bins for the crafts supplies and games: the IKEA KNAGGLIG and IKEA RISATORP. I added custom labels, in black, to match the look. I’m obsessed with the labels! They came out so great, and fit the vibe perfectly. Want custom, personalized labels in your playroom (or any other room in your home!)? Be sure to check out my Etsy page to order some of your own!
Finishing touches
How fun are these posters? You guessed it, another fun IKEA find. Keeping with the black and white aesthetic, I added two black mid-century lamps from Target and a black and white rug.
I originally planned on staining the IVAR cabinets in a darker shade, but while I waited all winter for the weather to warm up (stains need to be done outside), the light color has grown on me. I still want to protect the wood, though, with a polyutherane finish, so stay tuned for an update later this Spring.
In the meantime, we’ll be down in the playroom: crafting, creating, and playing!